
Macro photography opens up a fascinating world of tiny details, allowing you to capture the intricate beauty of flowers, insects, and other small subjects. Whether you’re a professional photographer or an enthusiastic hobbyist, this comprehensive guide will equip you with essential tips and techniques to elevate your macro photography skills. From equipment selection to composition, lighting, and post-processing, we’ll cover it all. Get ready to delve into the mesmerizing realm of macro photography and unlock your creative potential.
Understand Macro Photography:
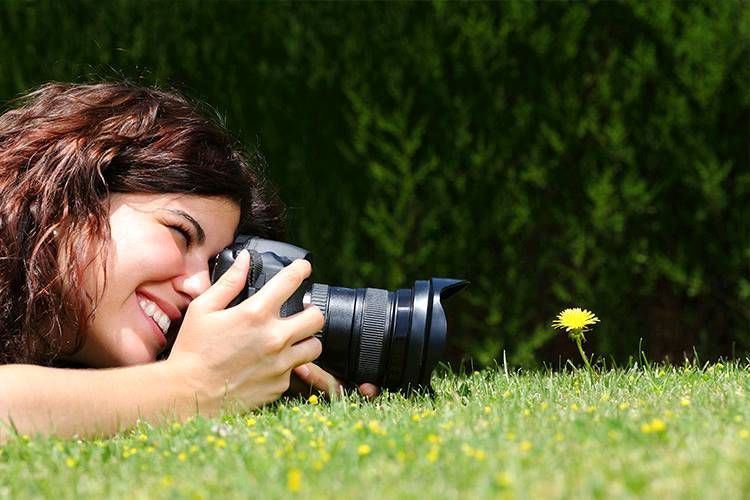
Before diving into the technical aspects, it’s crucial to grasp the essence of macro photography. Macro photography involves capturing extreme close-up shots of small subjects, revealing intricate details that are often unseen by the naked eye. It requires specialized equipment and techniques to achieve stunning results.
Essential Equipment:
To embark on your macro photography journey, you’ll need the right gear. Here’s a list of essential equipment to consider:
a. Macro Lens: Invest in a dedicated macro lens with a 1:1 magnification ratio for optimal results. Options range from prime lenses to zoom lenses, each with its own advantages.
b. Tripod: A sturdy tripod is crucial to keep your camera steady during macro photography, as even the slightest movement can ruin your shot.
c. Macro Flash or External Lighting: Proper lighting is key to capturing sharp and well-exposed macro images. Consider using a macro flash, LED ring light, or diffused external lighting for precise control over lighting conditions.
d. Extension Tubes or Close-Up Filters: These affordable alternatives can help you achieve macro-like results if a dedicated macro lens isn’t available immediately.
Mastering Focus and Depth of Field:
Achieving sharp focus and controlling depth of field are essential elements of macro photography. Since macro subjects are often small and have limited depth of field, precise focus is critical. Use these techniques to enhance focus and depth of field:
a. Manual Focus: Switch to manual focus and use a small aperture (higher f-stop number) to increase the depth of field and ensure maximum sharpness.
b. Focus Stacking: Capture a series of images with different focus points and blend them using specialized software to create a final image with extended depth of field.
Composition and Framing:
Effective composition plays a vital role in macro photography. Consider these tips to create visually compelling images:
a. Rule of Thirds: Apply the rule of thirds to place your subject off-center, creating a more balanced and visually appealing composition.
b. Negative Space: Utilize negative space around your subject to enhance its prominence and draw the viewer’s attention.
c. Background Selection: Pay attention to the background, as a cluttered or distracting background can detract from your subject. Look for clean, contrasting backgrounds that allow your subject to stand out.
Lighting Techniques:
Lighting is crucial in macro photography, as it influences the mood, colors, and details in your images. Consider these lighting techniques:
a. Natural Light: Utilize natural light to create soft and diffused illumination. Shoot during the golden hour or in shady areas for a pleasing effect.
b. Artificial Lighting: Experiment with external flash or LED lighting to provide additional illumination and control over the lighting conditions. Diffuse the light to avoid harsh shadows.
Post-Processing Tips:
After capturing your macro shots, post-processing can enhance their visual impact. Here are some post-processing tips:
a. Adjusting Exposure: Fine-tune the exposure, brightness, and contrast to bring out the details and ensure a well-balanced image.
b. Sharpening: Apply selective sharpening techniques to enhance the fine details while avoiding oversharpening.
c. Color Correction: Adjust the white balance and color saturation to achieve accurate and vibrant colors in your macro images.
d. Cropping and Framing: Use cropping to remove any distractions and improve the composition. Experiment with different aspect ratios to find the most visually appealing framing.
e. Retouching: Address any imperfections or distractions using spot healing or clone stamp tools. Be careful not to overdo it and maintain the natural look of your subject.
Macro Lens How to Use
Using a macro lens is a fantastic way to capture close-up shots with intricate details. Here’s a step-by-step guide on how to use a macro lens effectively:
Attach the Macro Lens: Start by attaching the macro lens to your camera body. Ensure the lens is securely mounted and locked into place. Follow the manufacturer’s instructions for your specific lens model if you’re unsure.
Switch to Manual Focus: Switch your camera to manual focus mode. Macro photography requires precise focusing, and manual focus gives you better control over the focus point.
Set the Aperture: Select a small aperture (higher f-stop number) to increase the depth of field. This helps to ensure that a larger portion of your subject remains in focus. However, be mindful that using very small apertures can impact image sharpness due to diffraction, so find the optimal balance for your lens.
Use a Tripod: To eliminate camera shake and ensure sharp images, it’s advisable to use a sturdy tripod. This stability is crucial, especially when shooting at close distances, as any slight movement can cause blur. Attach your camera securely to the tripod.
Compose Your Shot: Consider the composition of your macro shot. Explore different angles, perspectives, and framing options to create visually compelling images. Apply compositional techniques such as the rule of thirds, leading lines, or symmetry to add interest.
Focus Manually: Engage live view mode on your camera if available, as it provides a magnified view of your subject. This makes it easier to manually focus precisely. Use the focus ring on the lens to adjust the focus until the desired area is sharp. Take your time and be patient to achieve accurate focus.
Control Lighting: Ensure proper lighting for your macro shots. Natural light can work well, especially diffused or during the golden hour, but you may also need additional lighting to illuminate your subject adequately. Experiment with external flash, LED lights, or diffusers to achieve the desired lighting conditions.
Shoot in Burst Mode: Macro subjects can be quite dynamic, especially insects or flowers in the wind. Shooting in burst mode allows you to capture a series of shots in quick succession, increasing the chances of getting a perfectly sharp image.
Experiment with Depth of Field: Macro photography often involves shallow depth of field. Experiment with different apertures to achieve the desired effect. You can selectively focus on specific parts of your subject and let the rest blur out, or you can increase the depth of field by closing down the aperture.
Review and Refine: After taking a series of shots, review them on your camera’s LCD screen to ensure you’ve captured the desired details and composition. Make any necessary adjustments to the focus, framing, or settings as needed. Take multiple shots to increase your chances of getting the perfect image.
Post-Processing: Once you’ve captured your macro photos, you can enhance them further with post-processing. Use software like Adobe Lightroom or Photoshop to adjust exposure, contrast, sharpness, and colors. However, strive to maintain a natural look and avoid excessive editing.
If you are a beginner in Macro Photography try this Macro Photography guide for beginners. By following these steps and practicing regularly, you’ll become more comfortable and skilled at using a macro lens to capture stunning close-up images with exceptional detail. Enjoy the process of exploring the miniature world and unleashing your creativity through macro photography.
How to Take Good Macro Photos
Taking good macro photos requires a combination of technical knowledge, attention to detail, and artistic vision. Here are some essential tips to help you capture stunning macro images:
Use the Right Equipment for macro photography: Invest in a dedicated macro lens or explore alternative options such as extension tubes or close-up filters to achieve high-quality macro shots. Ensure your camera is stable by using a tripod or other stabilization methods.
Understand Depth of Field: Macro photography has a shallow depth of field, meaning that only a small portion of your subject will be in focus. To increase depth of field, choose a smaller aperture (higher f-stop number). Experiment with different apertures to strike the right balance between sharpness and background blur.
Focus with Precision: Achieving sharp focus is crucial in macro photography. Switch to manual focus and use live view or focus peaking to pinpoint the exact focus point. Alternatively, you can use autofocus with a single-point focus mode. Take your time to ensure critical areas of your subject are in focus.
Pay Attention to Lighting: Lighting plays a vital role in macro photography. Avoid harsh and direct sunlight, which can create harsh shadows and blow out highlights. Opt for soft and diffused lighting conditions, such as shooting in the shade or using a diffuser to soften the light. Experiment with natural light, artificial lighting, or a combination of both to achieve the desired effect.
Experiment with Composition: Explore different composition techniques to create visually appealing macro images. Apply the rule of thirds, leading lines, and diagonal compositions to add interest and balance to your photos. Experiment with different angles, perspectives, and framing to capture unique and captivating shots.
Mind the Background: A distracting or cluttered background can take away from the impact of your macro subject. Look for clean and uncluttered backgrounds that provide contrast and allow your subject to stand out. Consider using a shallow depth of field to blur the background and create separation between the subject and its surroundings.
Capture Details and Textures: Macro photography is all about capturing intricate details and textures. Get up close and personal with your subject to reveal its unique features. Pay attention to the small details, such as tiny hairs, water droplets, or patterns, that can add depth and interest to your photos.
Patience and Persistence: Macro photography often requires patience and persistence. Small subjects can be unpredictable, and capturing the perfect shot may take time. Be prepared to experiment, take multiple shots, and make adjustments until you achieve the desired result.
Post-Processing: Post-processing can enhance the visual impact of your macro photos. Use software like Adobe Lightroom or Photoshop to adjust exposure, color balance, sharpness, and contrast. However, remember to maintain a natural and realistic look, avoiding excessive editing that can make your images appear artificial.
Practice, Explore, and Have Fun: Macro photography is a journey of exploration and creativity. Practice regularly, experiment with different subjects and techniques, and don’t be afraid to try new things. Embrace the beauty of the miniature world and enjoy the process of capturing unique macro images. Remember, the key to taking good macro photos is a combination of technical knowledge, artistic vision, and practice. With time and experience, you will develop your own style and capture stunning macro images that showcase the intricate details of the world around us.
Macro photography offers a unique perspective on the world, allowing you to capture the beauty of small subjects with incredible detail. By understanding the fundamentals and applying the techniques mentioned in this guide, you can elevate your macro photography skills and create stunning close-up shots. Remember, practice and experimentation are key to honing your craft, so don’t be afraid to explore and push the boundaries of your creativity. Get out there, explore the miniature wonders around you, and capture captivating macro images that will leave viewers in awe. Happy shooting!